Create a Stacking & Blocking
In order to create a Stacking & Blocking two things must exist.
- There needs to be a Space program
- There needs to be at least one Building
You create a new Stacking & Blocking by doing the following:
- Open the Space program that you would like to Stack & Block
- Navigate to the "Stacking & Blocking" menu item in the Space program. In other languages this menu item is called "Allocation".
- Click the "New" Button at the top right to create a new Stacking & Blocking
- Enter the name of your Stacking & Blocking and optionally a description
- Choose one (or multiple) buildings to include in this Stacking & Blocking
- Click Save
At this point, the newly created Stacking & blocking will open. This module consists of three main screens:
- The Stacking & Blocking chart
- A Bulk edit screen
- A manual edit screen
You can toggle between these screens using the three icons at the top left. The normal operation is to use Bulk edit to assign the majority of the spaces into logical groupings and fine-tune the allocations by using Manual edits. Typically you navigate between these three screens to create a Stacking & Blocking configuration.
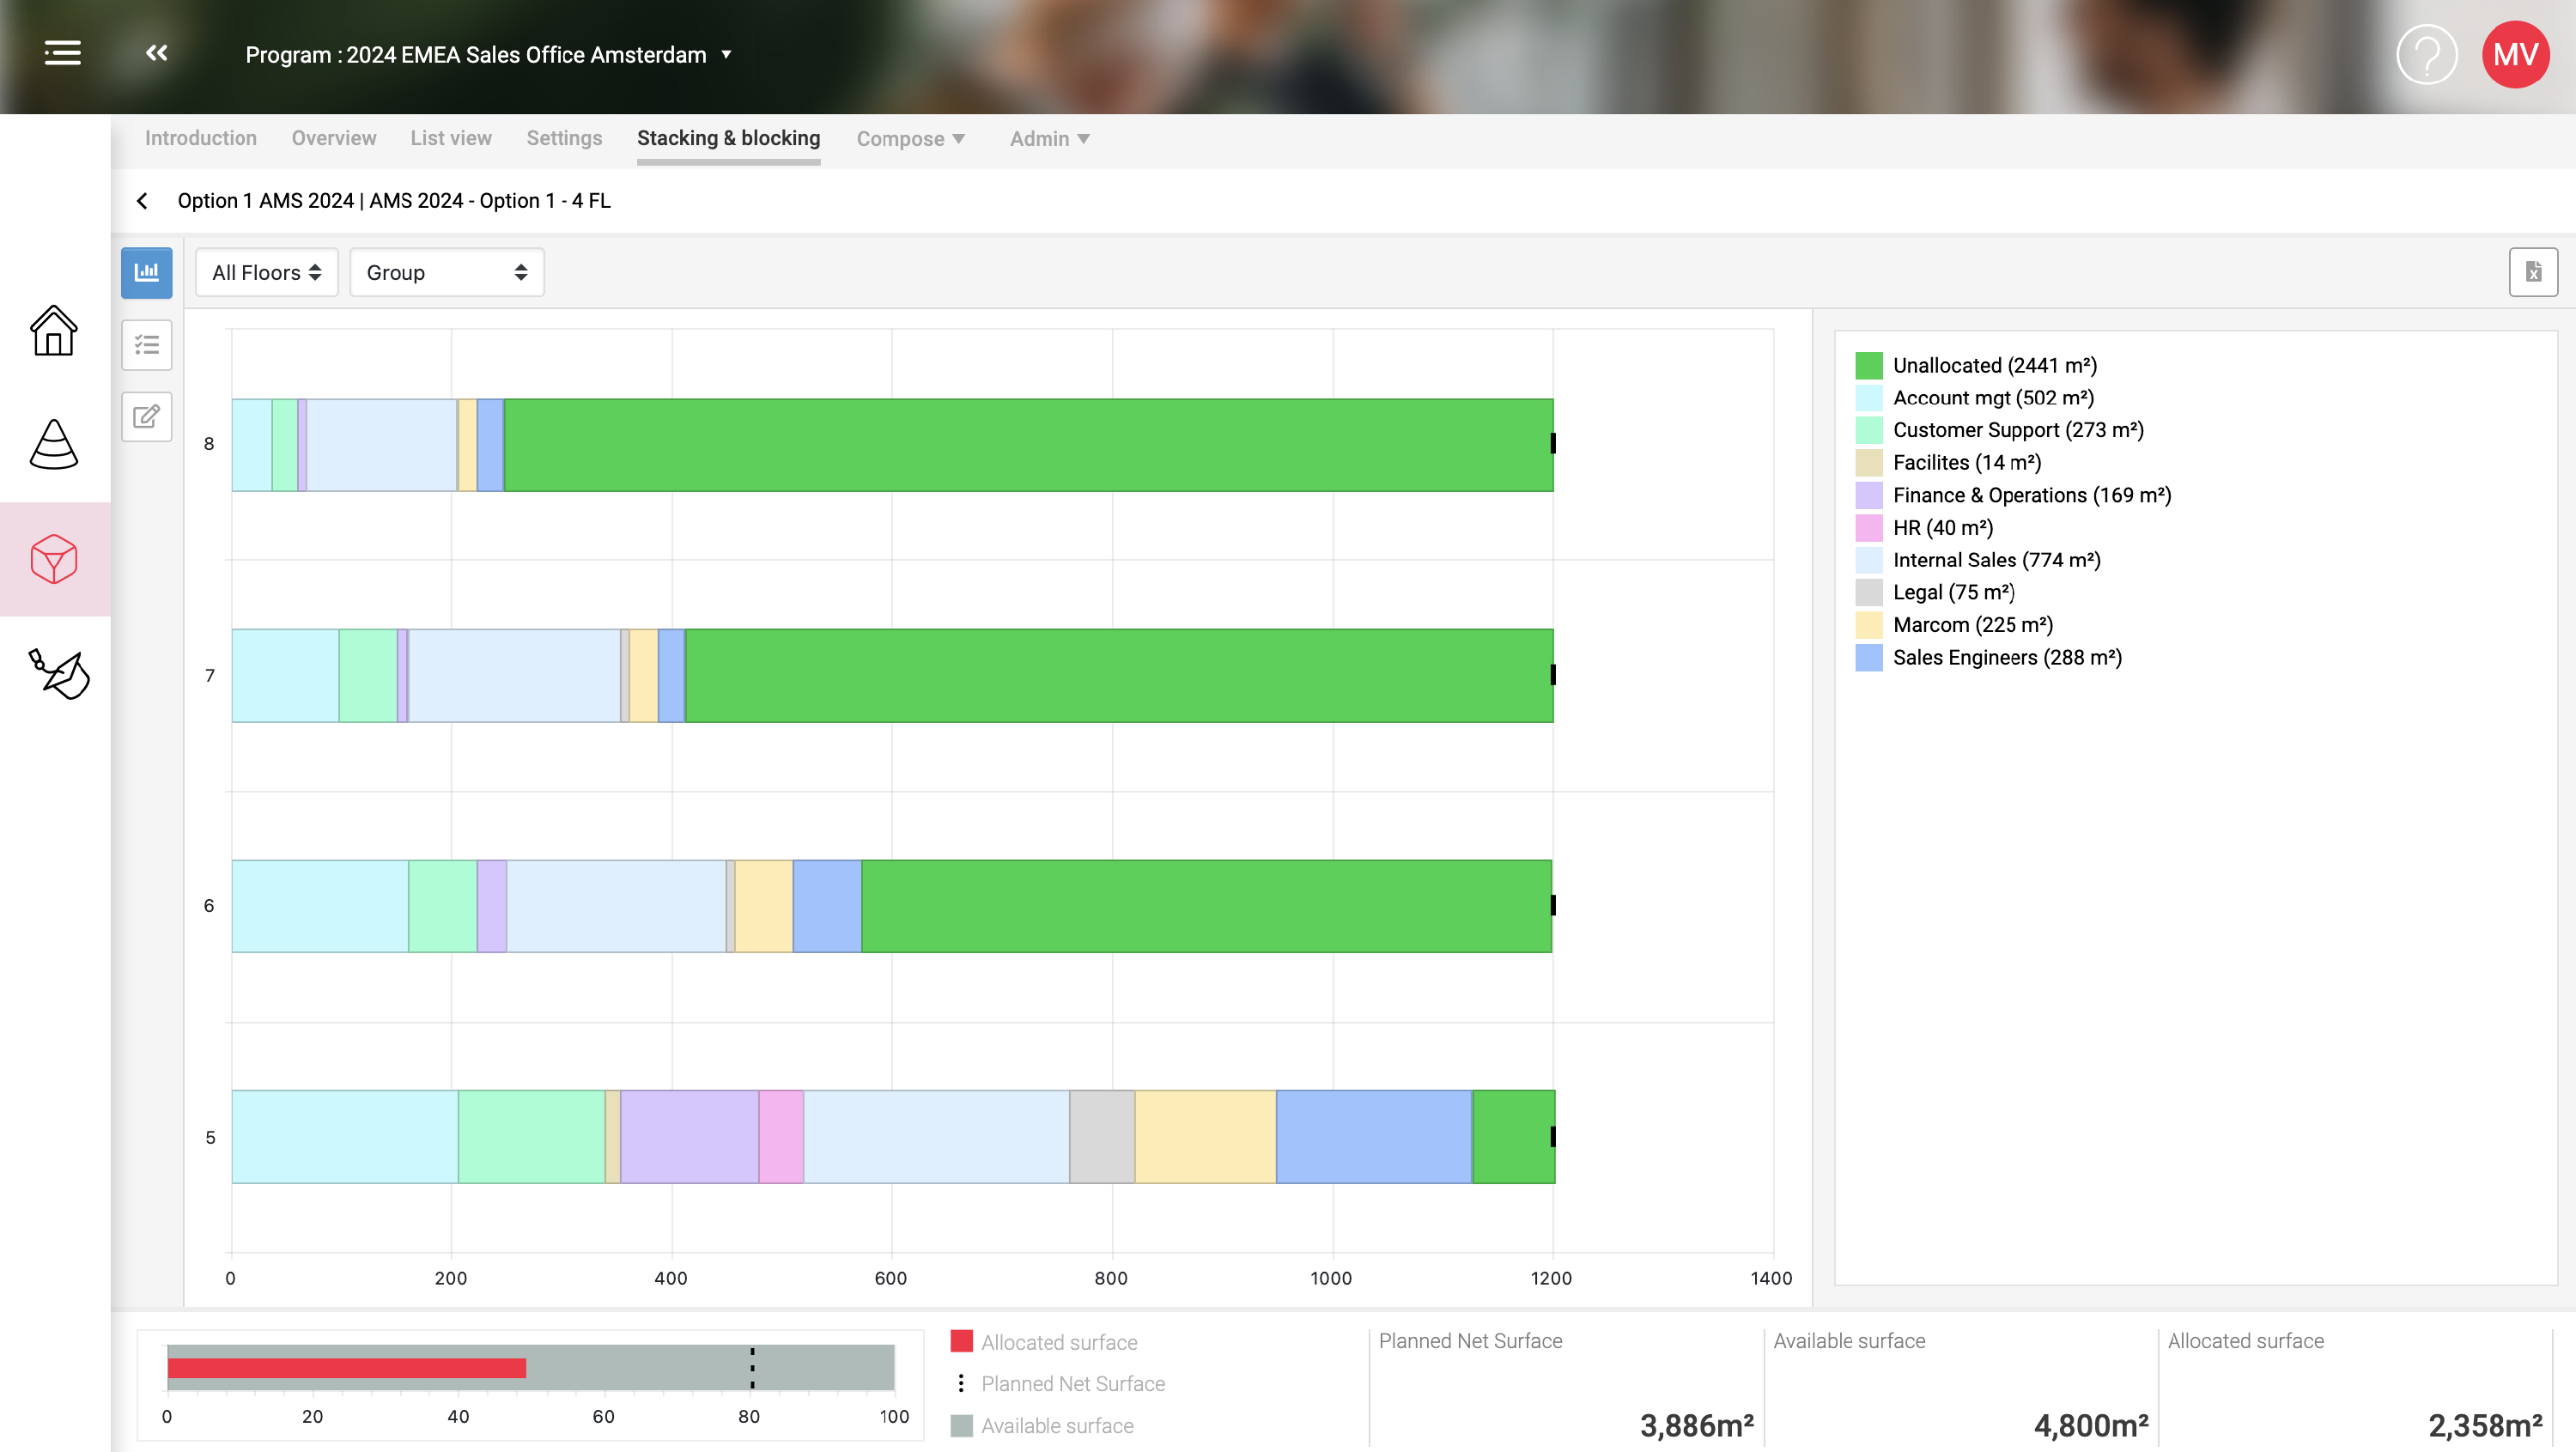
Stacking & blocking chart screen
This screen shows you the chart of the Stacking & Blocking. You can select a floor to zoom into it or choose a method to display the "Blocks" per floor.
Choose "Groups" to display the blocks of spaces per Group.
Choose one of the available Tags to display the blocks of Spaces per Tag-value in the selected Tag (e.g. function)
Choose "SpaceType" to display the block of Spaces per SpaceType.
For all three options, it helps when the items are colored.
After selecting a floor it is possible to display the Blocks as a "Bar chart" or as a "Tree map chart" using the two icons at the top right.
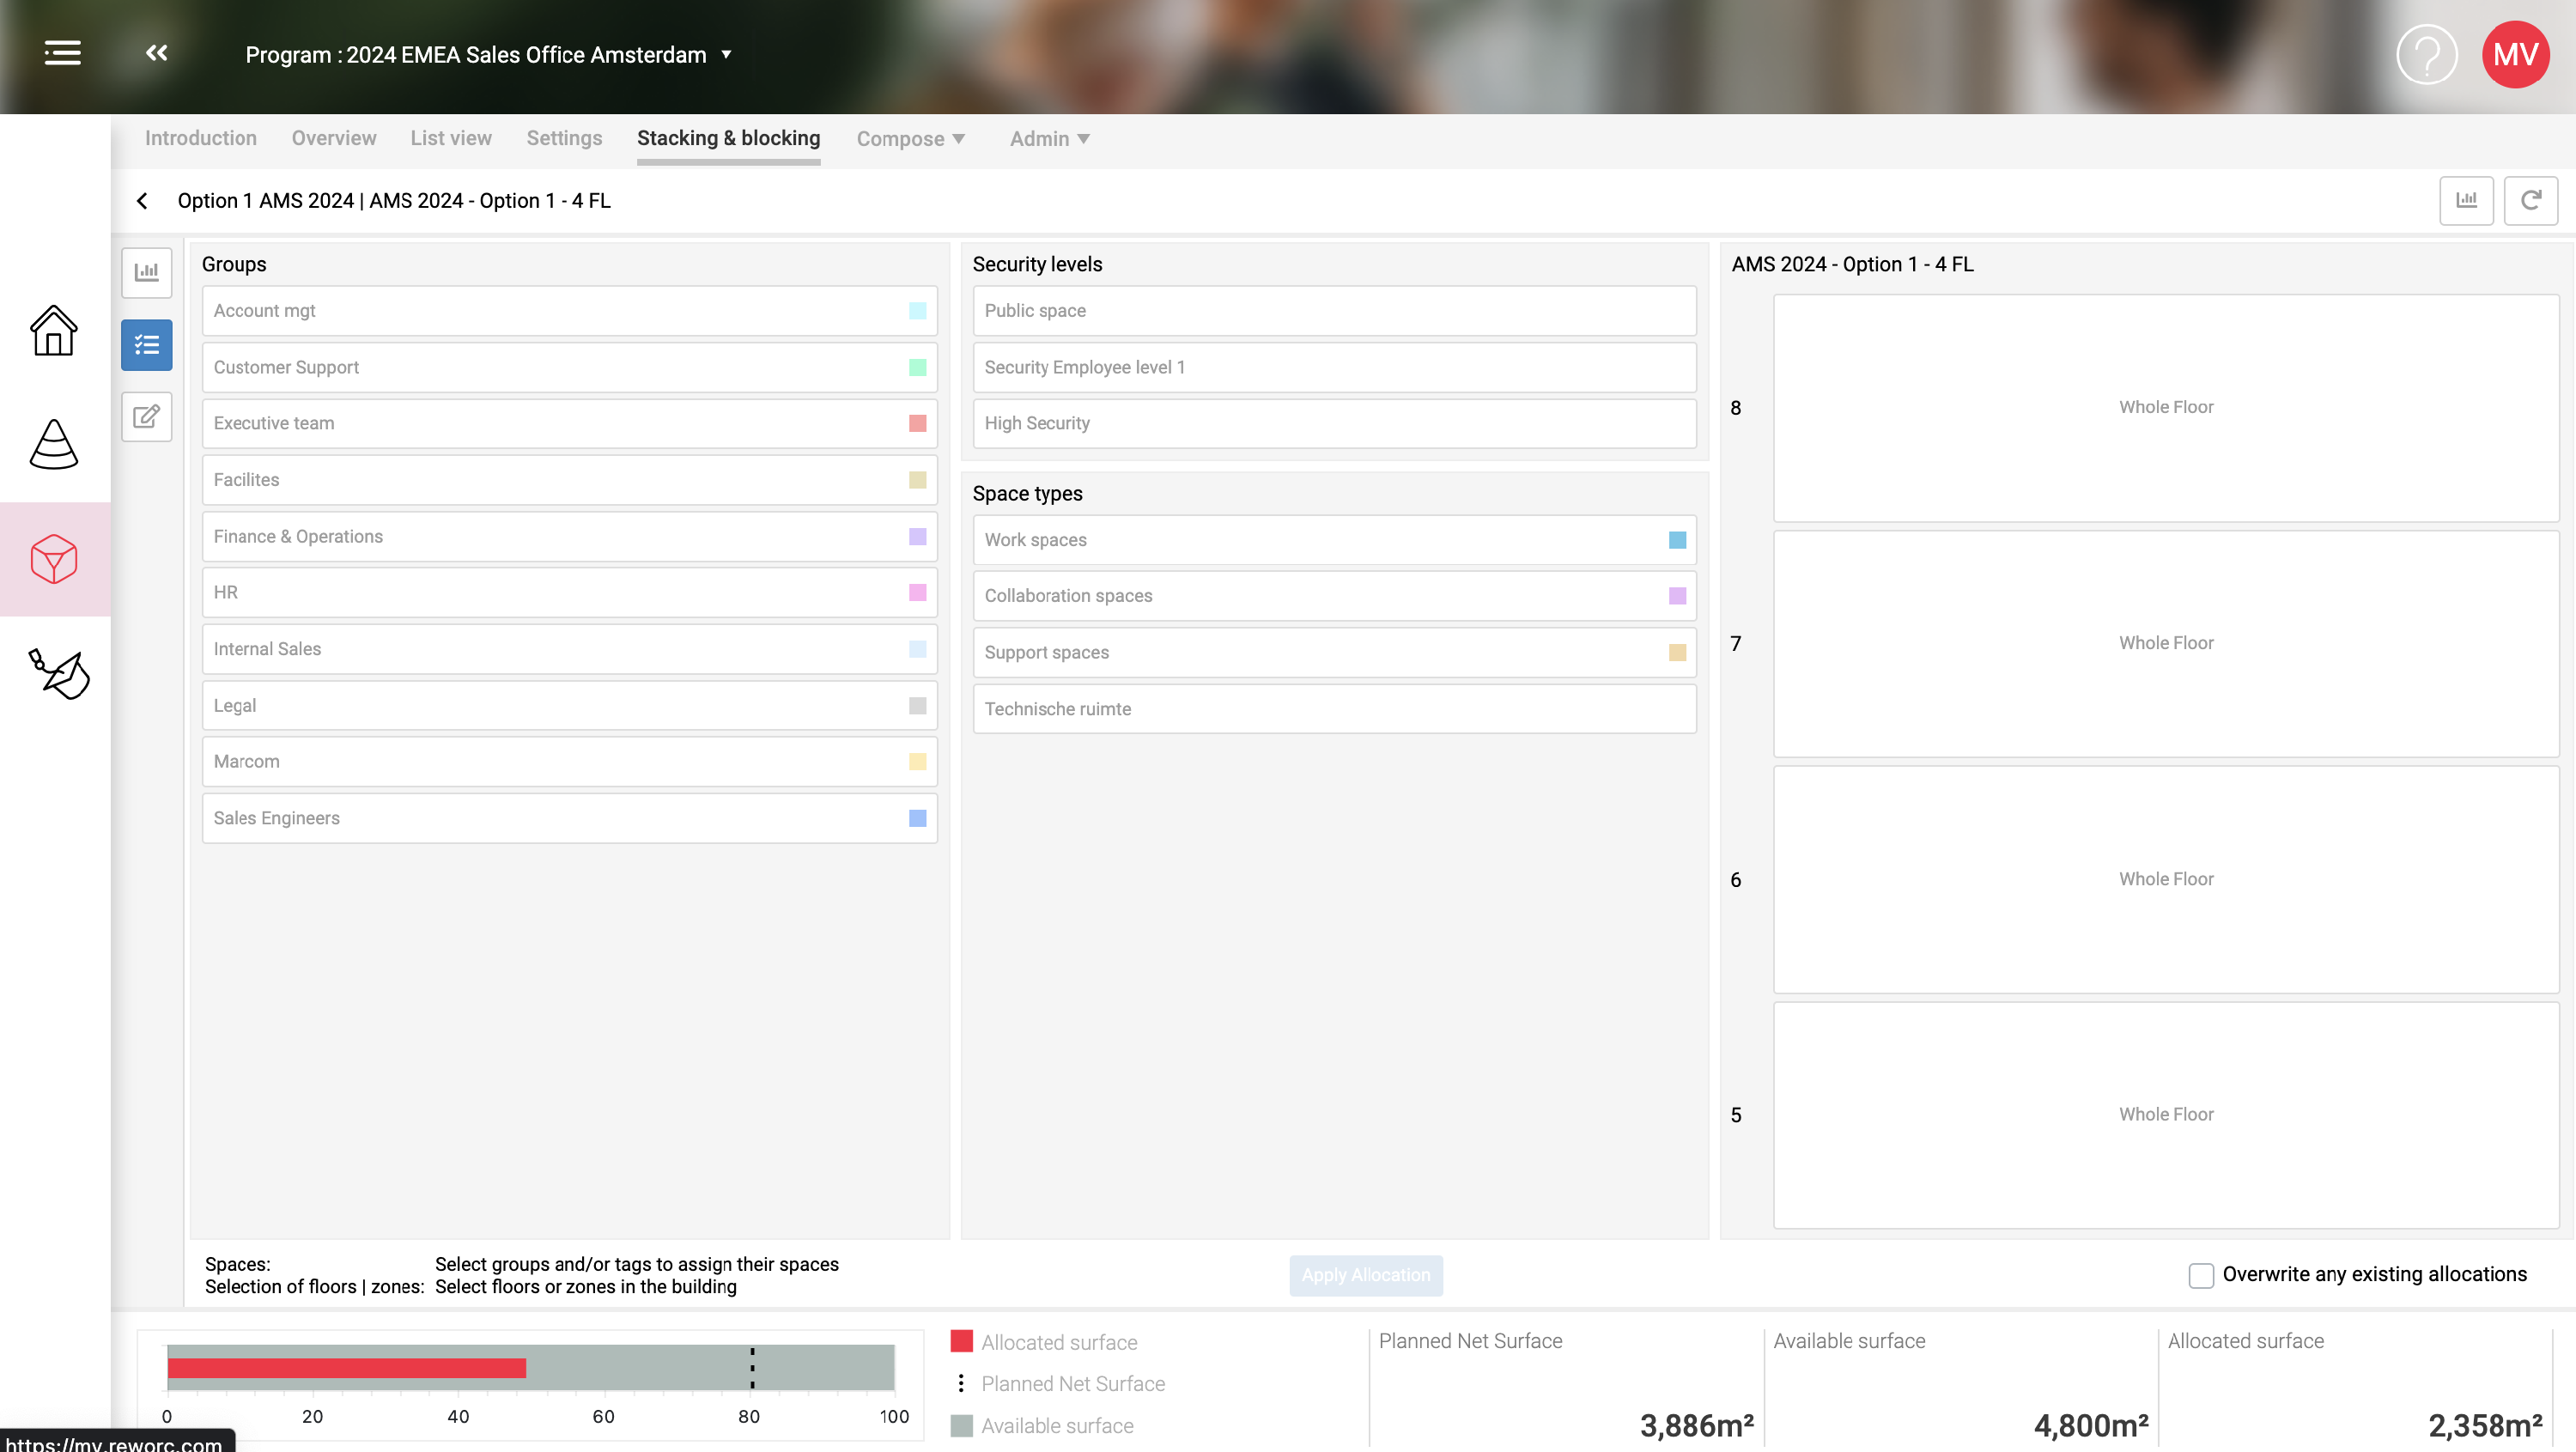
Bulk Edit screen
This screen allows you to allocate Spaces to one or more floors in bulk. The screen consists of three panels. The first two panels show you the items that can be allocated in Bulk mode. Choose a Group and/or a Tag to allocate the spaces within those Groups and/or Tags.
If you select a Group and a Tag only the Spacetypes that match both will be bulk allocated. This allows you to make smart selections to Stack and Block.
The third panel shows you the Floors (and optional Zones) of the selected building. If there are multiple buildings the building can be chosen using a pull-down menu.
Click on the Floors you would like your current selection of Spaces (as defined by their Group and/or Tag values) to be allocated to. The information bar below the selection will show you how many spaces and how much surface will be allocated if you click the "Apply Allocation" button.
Spaces that are already allocated will not be automatically re-allocated if you select them again. If you want to override earlier allocations, remember to check the "Overwrite any existing allocations" checkbox.
The number of spaces will be evenly distributed over the selected floors. When there is an uneven number the floor with the highest amount of un-allocated surface area will allocate more Space types.
It is possible to open the fourth panel to show a chart with the current Stacking & Blocking.
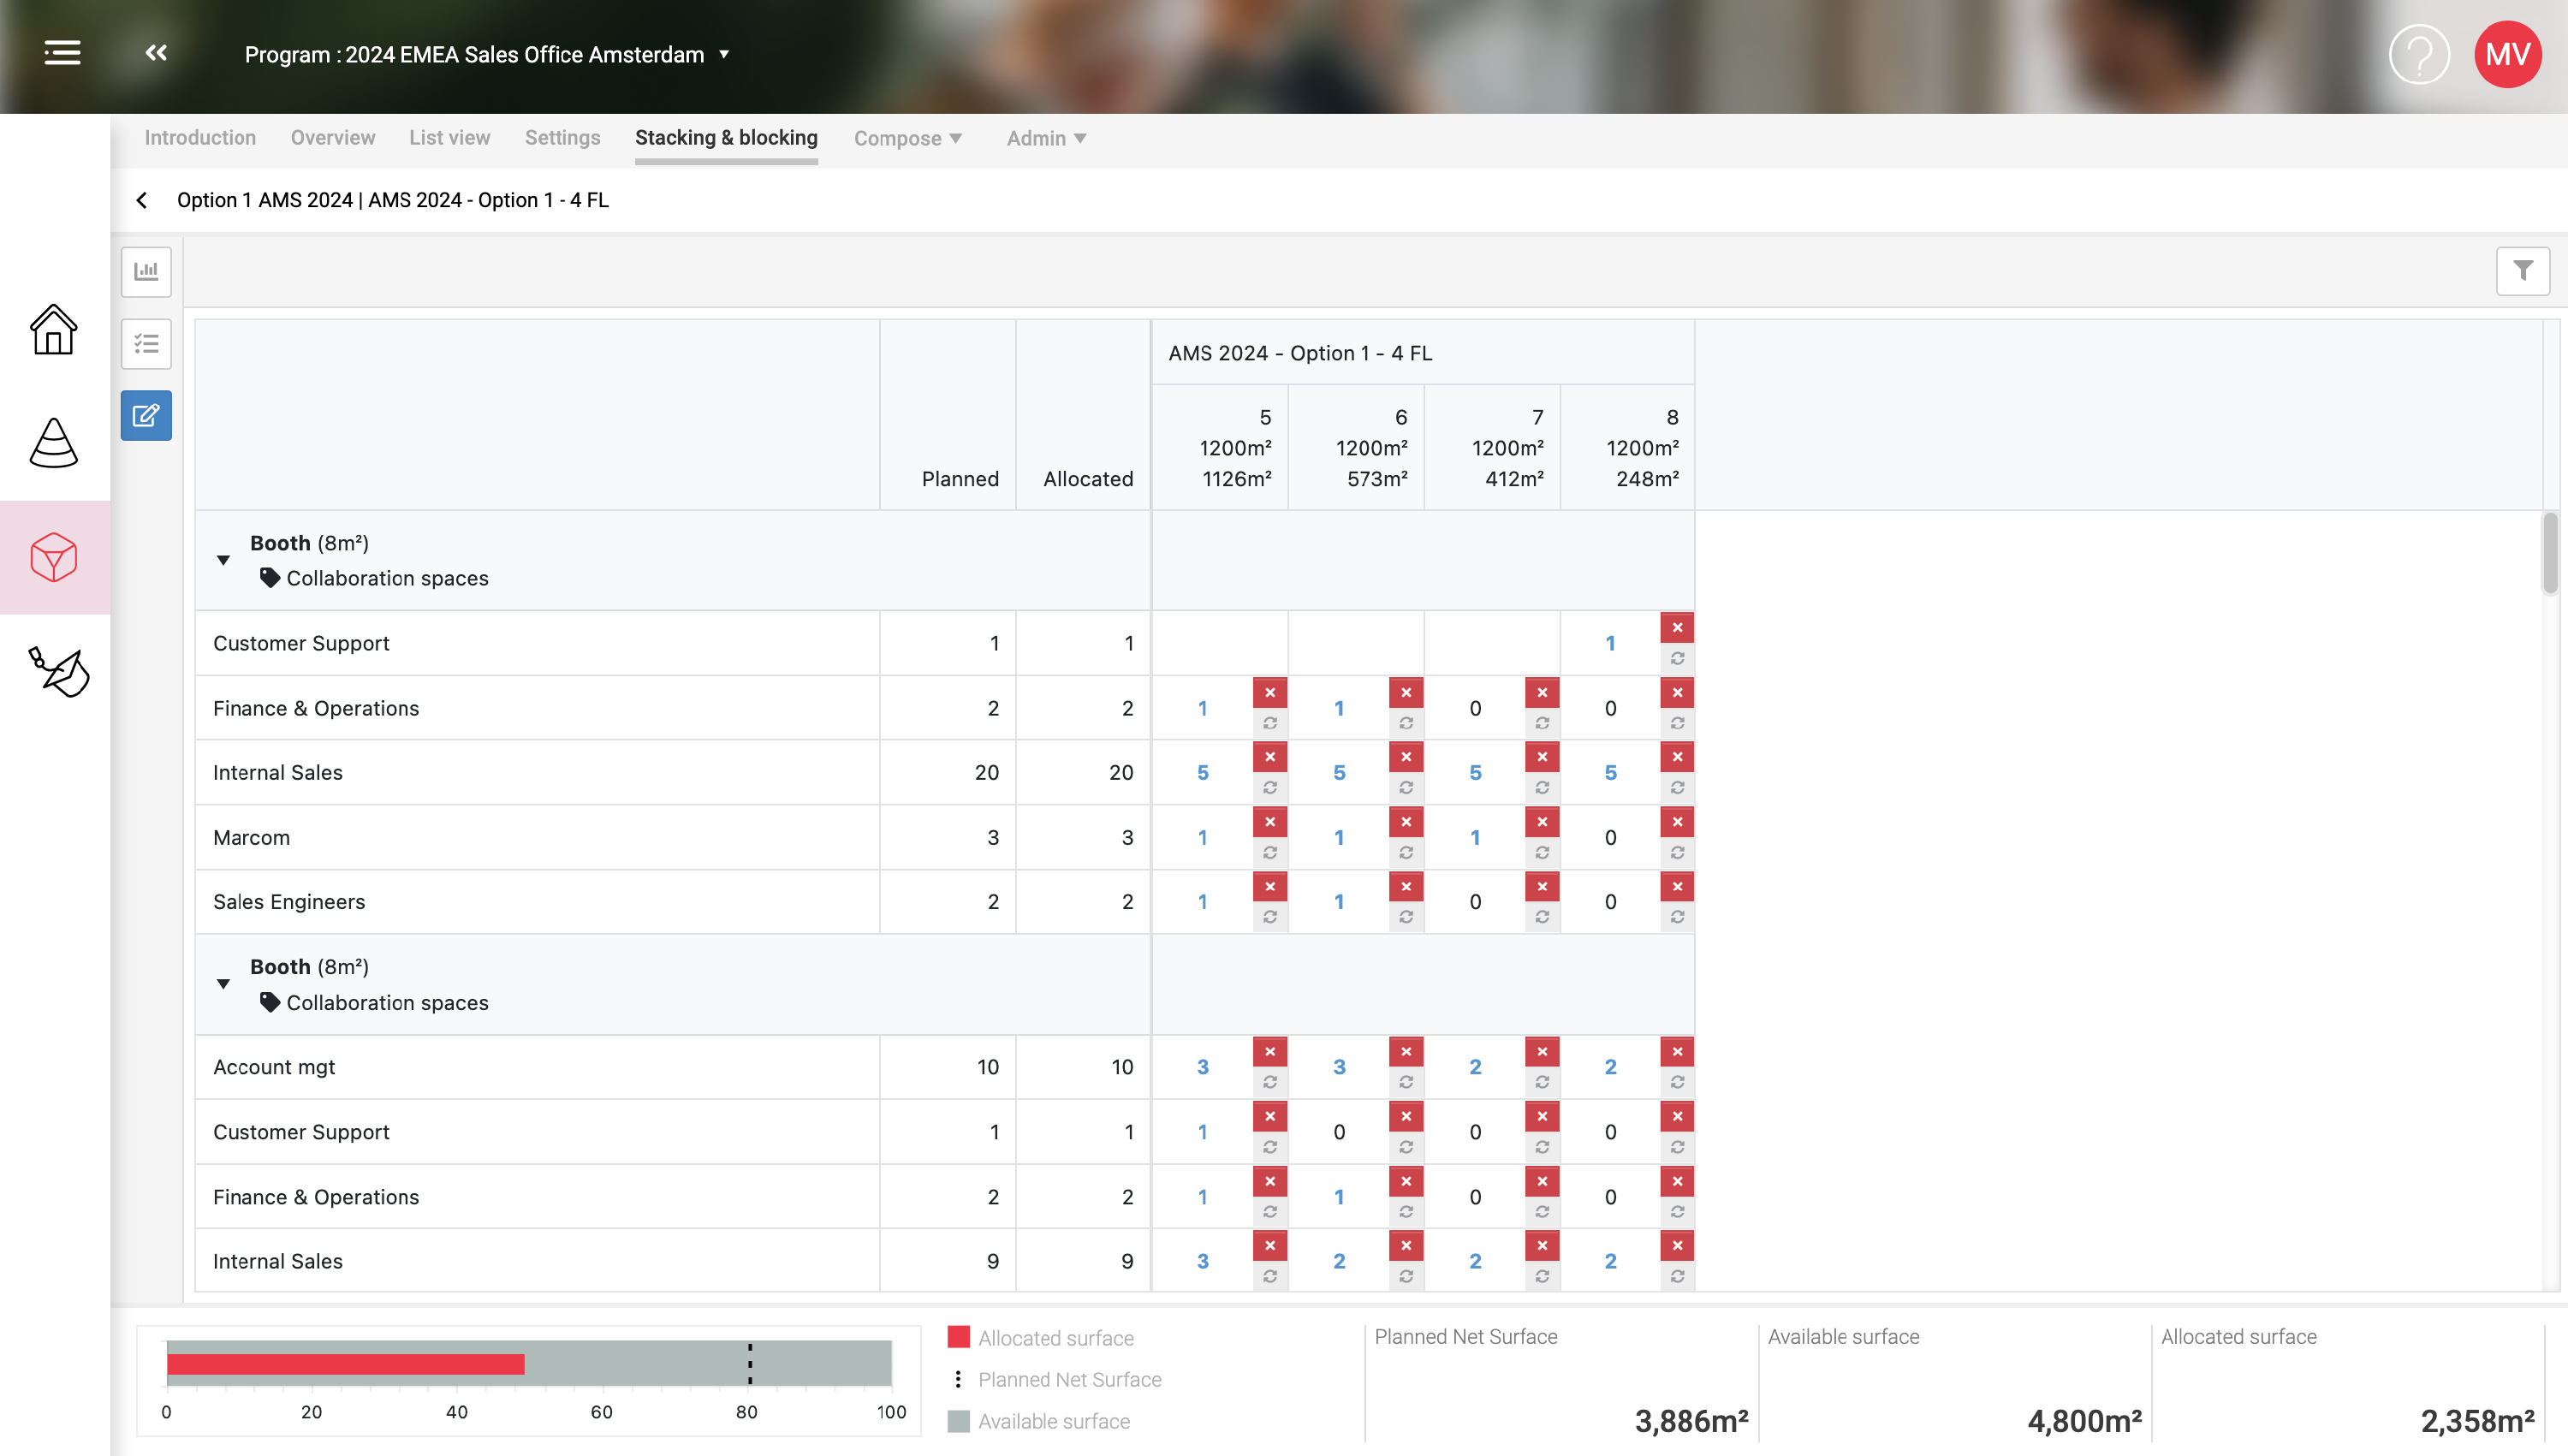
Manual Edit screen
This screen allows you to allocate Spaces to one or more floors in detail. The screen consists of a scrollable table and a filter panel. The filter panel allows you to reduce the number of rows in the scrollable table, based on the chosen filters.
The scrollable panel contains a row for each Space type in each Group. Each row contains the following information:
- The name of the SpaceType
- The size of the individual SpaceType
- For each Group the SpaceType appears in:
- The name of the Group
- The number of planned instances of the SpaceType (from the Space program)
- The number of allocated instances of the SpaceType (the sum of the allocated items on each Floor / Zone)
- A section for each Building in the Stacking & Blocking
- Each Floor / Zone in the Building
- The number of Allocated SpaceTypes on that Floor / Zone
By clicking on a SpaceType row in the cell of a Floor or Zone the spaces will be allocated to that Floor/Zone. Subsequent clicks on other Floors/zones will evenly divide the number of allocated spaces across the number of used floors. For uneven numbers, the floor with the highest available unallocated surface area will receive more space instances.
It is possible to manually enter a desired amount of spaces by clicking on the allocated number and changing it by using the up/down stepper or entering a number directly. The remaining values will be redistributed across all the floors currently being allocated. Once a cell contains a manual override it will not receive an automatic redistribution. This way you can intuitively and quickly allocate the desired number of spaces across floors and zones.
By clicking on the re-allocate button (two arrows in a circle) the manual override will be removed and the normal allocation will occur.